Last update: 2021.03.28
In a previous project, I described how to set up a configurable web filter based on Privoxy, Squid and SquidGuard to filter out unwanted content on the web.
Here, we will see how to turn the r-pi as a wireless access point with transparent HTTP/HTTPS proxy. “Transparent” means that anyone connecting to the wifi will have all traffic automatically redirected through the proxy server and content will be filtered.
This method is more difficult to circumvent as all the parameters are set on the server side and not on the client side. But there are some pros and cons that we will explore further below.
Step 1: Configuring the access point host software (Hostapd)
First, update the system
sudo apt-get update && sudo apt-get upgrade -y
Install Hostapd
sudo apt-get install hostapd
Edit the dhcpcd configuration file
sudo nano /etc/dhcpcd.conf
Add the following lines at the end.
interface wlan0
static ip_address=192.168.4.1/24
nohook wpa_supplicant
Restart the dhcpcd daemon
sudo service dhcpcd restart
Edit the dhcpcd configuration file
sudo nano /etc/dnsmasq.conf
Add the following lines at the end.
# Configuration for Wi-Fi Access Point
interface=wlan0
dhcp-range=192.168.4.1,192.168.4.20,255.255.255.0,24h
Restart dnsmasq
sudo service dnsmasq restart
Edit the hostapd configuration file
sudo nano /etc/hostapd/hostapd.conf
This is my configuration. You can simply copy-paste, but don’t forget to rename the ssid and to set a password between 8 and 64 characters.
#a = IEEE 802.11a (5 GHz)
#b = IEEE 802.11b (2.4 GHz)
#g = IEEE 802.11g (2.4 GHz)

interface=wlan0
driver=nl80211
ssid=your_network_name
hw_mode=b
channel=7
wmm_enabled=0
macaddr_acl=0
auth_algs=1
ignore_broadcast_ssid=0
wpa=2
wpa_passphrase=your_password
wpa_key_mgmt=WPA-PSK
wpa_pairwise=TKIP
rsn_pairwise=CCMP
Open the following file
sudo nano /etc/default/hostapd
Find #DAEMON_CONF and replace with
DAEMON_CONF="/etc/hostapd/hostapd.conf"
Enable and start hostapd
sudo systemctl unmask hostapd
sudo systemctl enable hostapd
sudo systemctl start hostapd
Check status to be sure all is working
sudo systemctl status hostapd
sudo systemctl status dnsmasq
Edit /etc/sysctl.conf
sudo nano /etc/sysctl.conf
and uncomment this line
net.ipv4.ip_forward=1
After reboot, you should be able to see and connect to your new access point, look for the ssid name that you have used in the hostapd.conf file. You will need to add an iptable masquerade rule to access the Internet
sudo iptables -t nat -A POSTROUTING -o eth0 -j MASQUERADE -m comment --comment "masquerade lan->wan"
If you have UFW enabled, you may want to add the rule below to allow all internal traffic on 192.168.4.0
sudo ufw allow from 192.168.4.0/24
Note At this point the iptable rule is not saved and will be lost after reboot. We will see later how to permanently apply iptable rules.
Reference
https://learn.pi-supply.com/make/how-to-setup-a-wireless-access-point-on-the-raspberry-pi/
https://thepi.io/how-to-use-your-raspberry-pi-as-a-wireless-access-point/
Step 2: Configuring Squid as transparent HTTP+HTTPS Proxy with iptables
First thing to do here is to configure squid with SSL-TLS supprt. The original distribution does not come with what we need. We will have to build Squid from the source with the necessary arguments. You may have Squid already installed, no worries as it will be replaced.
First, we need to install a few additional packages
sudo apt-get install dpkg-dev libldap2-dev libpam0g-dev libdb-dev cdbs libsasl2-dev debhelper libcppunit-dev libkrb5-dev comerr-dev libcap2-dev libecap3-dev libexpat1-dev libxml2-dev autotools-dev libltdl-dev pkg-config libnetfilter-conntrack-dev nettle-dev libgnutls28-dev libssl1.0-dev build-essential openssl
Now, we need to get the source package so we can build it with the following missing arguments enabled: –enable-ssl –enable-ssl-crtd –with-openssl. To do that, modify the source.list
sudo nano /etc/apt/sources.list
Uncomment the line below
deb-src http://raspbian.raspberrypi.org/raspbian/ buster main contrib non-free rpi
then update and get the Squid source package
sudo apt-get update && sudo apt-get source squid
Change directory. Make sure you have the same version, if not, modify as required.
cd squid-4.6
Open
sudo nano debian/rules
Look for –enable-ecap / and add the missing arguments right below
--enable-ssl --enable-ssl-crtd --with-openssl \
Open
sudo nano debian/control
Look for , nettle-dev and add the following right beolw
, libssl1.0-dev
Now, build your Squid
sudo dpkg-buildpackage -rfakeroot -b
Now you can have a beer or a coffee, the process takes some time.
When done, move out of the Squid directory
cd ..
We need two only these two packages: quid_4.6-1+deb10u5_armhf.deb and squid-common_4.6-1+deb10u5_all.deb
sudo dpkg -i squid_4.6-1+deb10u5_armhf.deb squid-common_4.6-1+deb10u5_all.deb
And
sudo apt-get install -f
Now let’s do a quick check
squid -v
And make sure the arguments that we have added are in place
Squid Cache: Version 4.6
Service Name: squid
Raspbian linux

This binary uses OpenSSL 1.0.2q  20 Nov 2018. For legal restrictions on distribution see https://www.openssl.org/source/license.html

...'--enable-ssl' '--enable-ssl-crtd' '--with-openssl' ...
Now, we will generate a certificate. In
cd /etc/squid
create a new directlory
sudo mkdir ssl_cert
Change permission
sudo chmod 700 ssl_cert/
As super user
sudo su
Change directory
cd ssl_cert
Now we can create the certificate with the following command
openssl req -new -newkey rsa:2048 -sha256 -days 365 -nodes -x509 -extensions v3_ca -keyout squid_ssl.pem -out squid_ssl.pem
We will also create a certificate that we will later import in the browser on the client side
openssl x509 -in squid_ssl.pem -outform DER -out squid_ssl.der
This last certificate will be needed on the client machine (a computer or laptop - I haven’t try with a mobile phone). I am using scp to export the file, but you can use any method you like
scp squid_ssl.der mbp-i7@192.168.1.xxx:/Users/mbp-i7
Now we generate the ssl_db with the following command
/usr/lib/squid/security_file_certgen -c -s /var/lib/ssl_db -M 4MB
Okay, let’s move out of the directory
cd ..
And change the user : group
chown -R proxy:proxy ssl_cert
chown -R proxy:proxy /var/lib/ssl_db
then exit super user mode
exit
Now, we need to edit the Squid configuration file
sudo nano /etc/squid/squid.conf
Under acl localnet src 192.168.1.0/24 # Home network add the following line
acl localnet src 192.168.1.0/24  # Home network
acl localnet src 192.168.4.0/24  # Wi-Fi Access Point network
Then, under http_port 3128 and add the following
http_port 3128
http_port 8080 intercept
https_port 3129 intercept ssl-bump \
        cert=/etc/squid/ssl_cert/squid_ssl.pem \
        generate-host-certificates=on dynamic_cert_mem_cache_size=4MB

sslcrtd_program /usr/lib/squid/security_file_certgen -s /var/lib/ssl_db -M 4MB
acl step1 at_step SslBump1
ssl_bump peek step1
ssl_bump bump all
ssl_bump splice all
If you have chained Squid with Privoxy you will have problems. Unfortunately, at the time of writing this project Privoxy does not handle HTTPS encripted traffic (version 3.0.28). So we are going to comment the lines related to Privoxy.
#cache_peer 192.168.1.xxx parent 8118 0 default no-query no-digest
#acl ftp proto FTP
#always_direct allow ftp
#never_direct allow all
#cache_effective_group proxy
Restart Squid
sudo service squid restart
Check Squid status to make sure all went well
sudo service squid status
So, no more Privoxy for the time being, but we might be able to bring it back with a newer version. This will be in another project. Note that you can use Privoxy, but only for the HTTP pages, which is not very useful as all HTTPS pages will show an error message.
Now the iptables
Add a Masquerade rule to allow Internet access
sudo iptables -t nat -A POSTROUTING -o eth0 -j MASQUERADE -m comment --comment "masquerade lan->wan"
Add Rules to allow ports 8080 and 3129
sudo iptables -A INPUT -j ACCEPT -p tcp --dport 8080 -m comment --comment "squid transparent http proxy"
sudo iptables -A INPUT -j ACCEPT -p tcp --dport 3129 -m comment --comment "squid transparent https proxy"
Optionally add more rules to allow other ports. For example the Dropbox LAN sync
sudo iptables -A INPUT -j ACCEPT -p tcp --dport 17500 -m comment --comment "dropbox lan sync"
Add Rules to redirect traffic. Here, we have the wlan0 (WiFi) traffic on 192.168.4.0/24 and the eth0 destination on 192.168.1.xxx depending on your configuration
sudo iptables -t nat -A PREROUTING -s 192.168.4.0/24 -p tcp --dport 80 -m comment --comment "squid transparent http proxy" -j DNAT --to-destination 192.168.1.xxx:8080
sudo iptables -t nat -A PREROUTING -s 192.168.4.0/24 -p tcp --dport 443 -m comment --comment "squid transparent https proxy" -j DNAT --to-destination 192.168.1.xxx:3129
Save the iptable rules
sudo sh -c "iptables-save > /etc/iptables.ipv4.nat"
Edit /etc/rc.local
sudo nano /etc/rc.local
Add the line below just above “exit 0” to install iptable rules on boot
iptables-restore < /etc/iptables.ipv4.nat
You can check your iptable rules with the following commands
sudo iptables -t nat -L
sudo iptables -L
Upload the client certificate on your browser
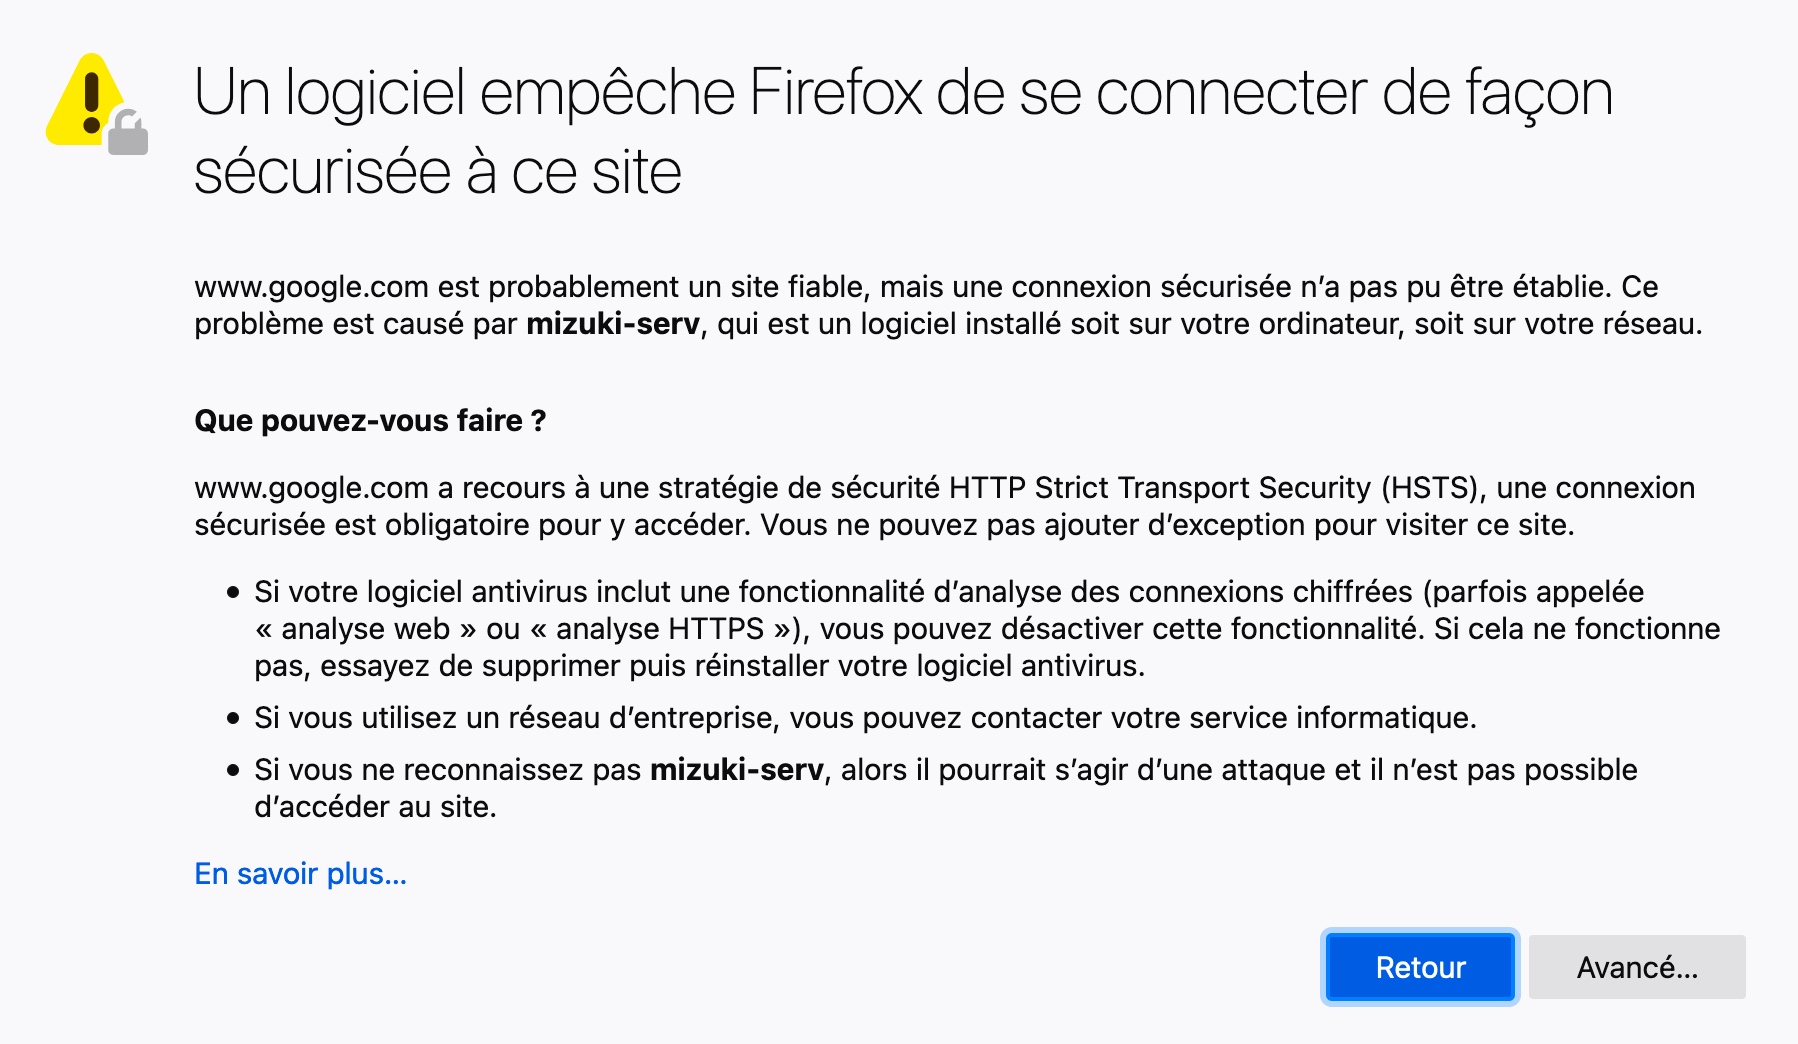
Remember that we have generated a certificate that we need to upload on the client’s browser to avoid a security warning. Now, if you try to go on the google page (or any other), you should see an error warning like this one
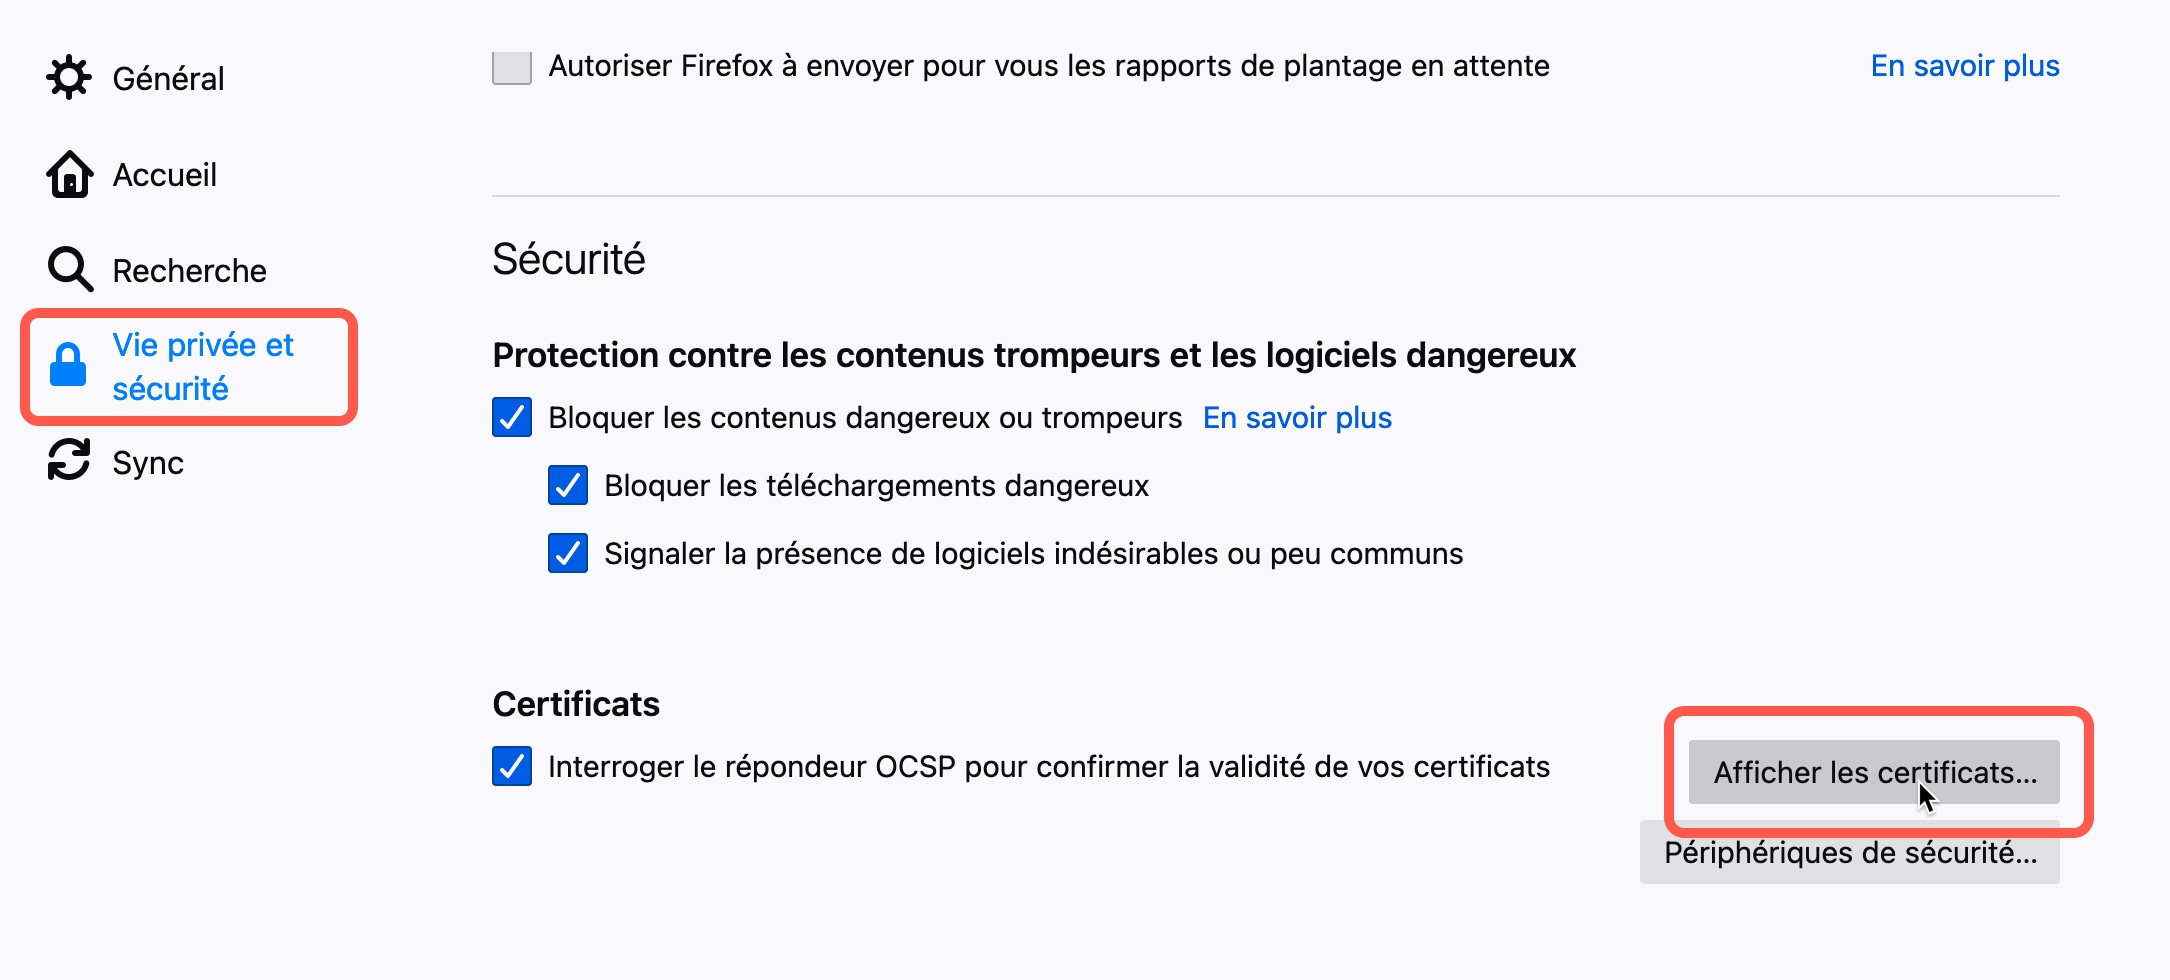
Go to the preference in your browser and look for “view certificates” under Security/Privacy. In FireFox, it looks like this
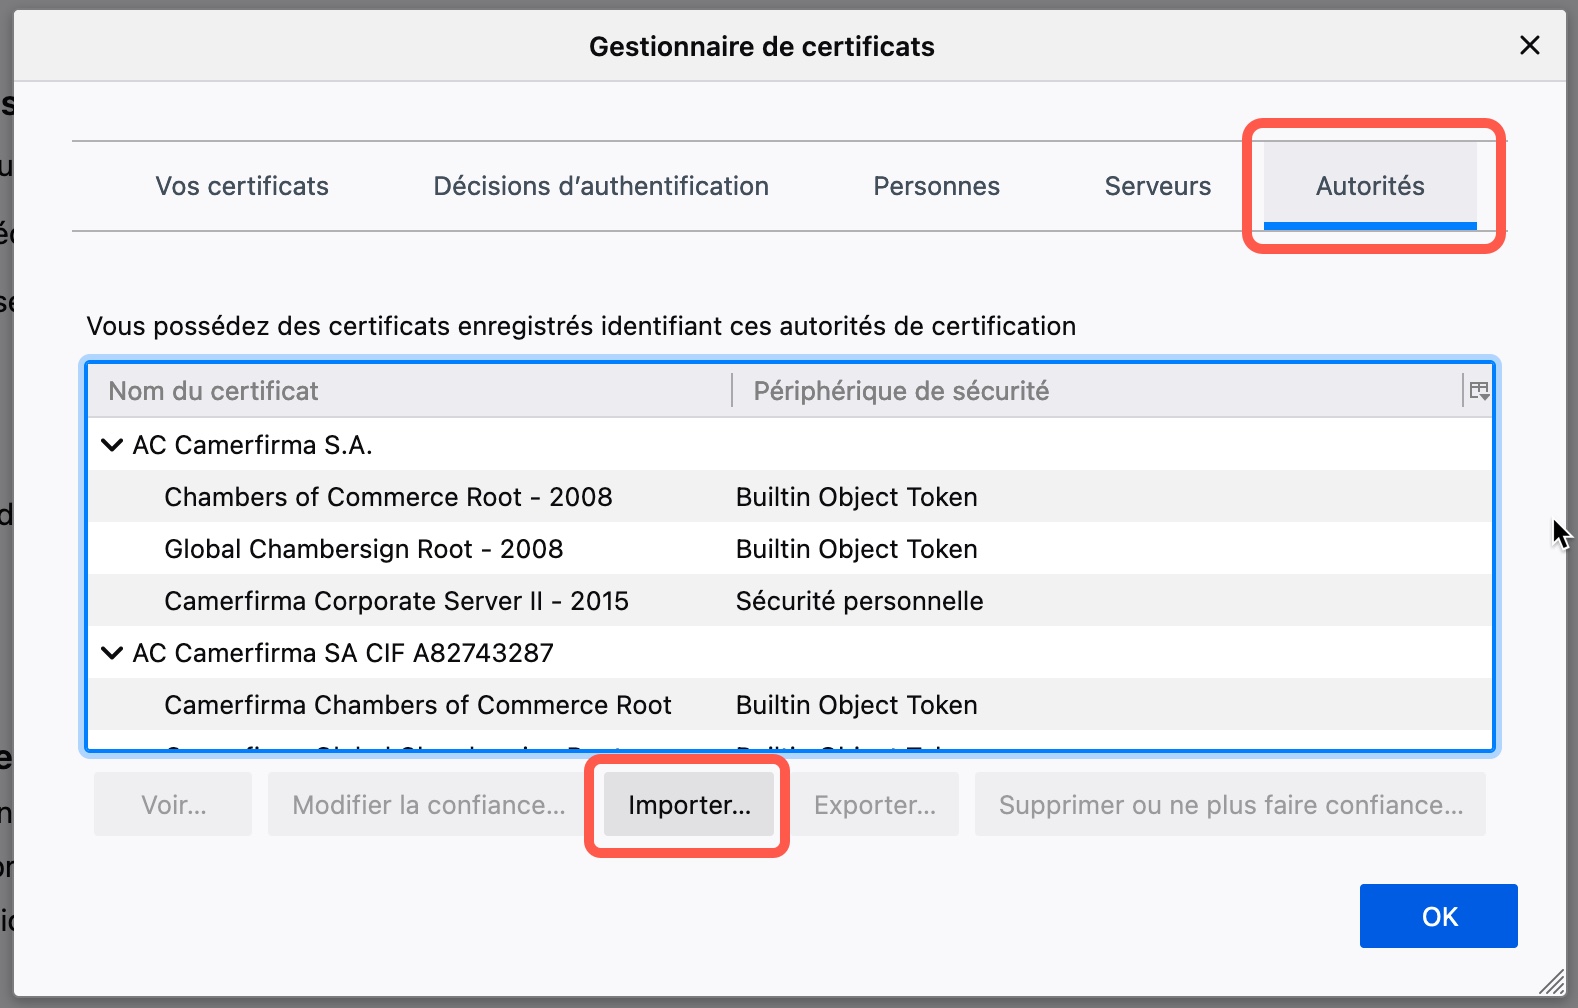
Import your certificate.
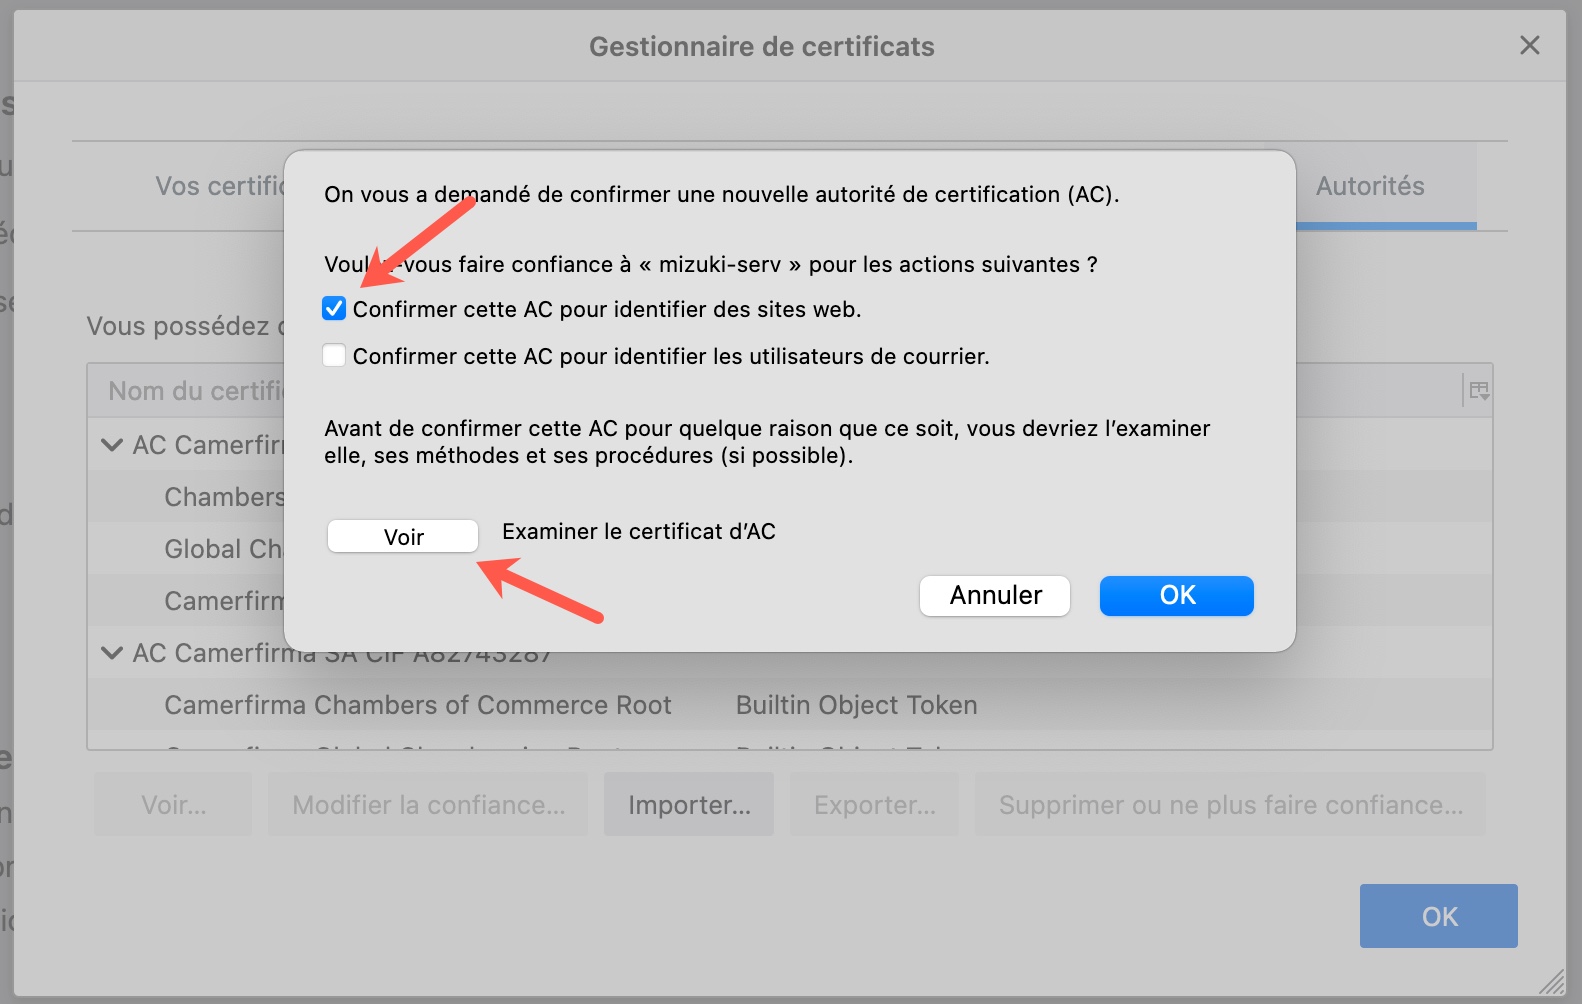
Check the box corresponding to the web site authentication. You can also view the cert detail info.
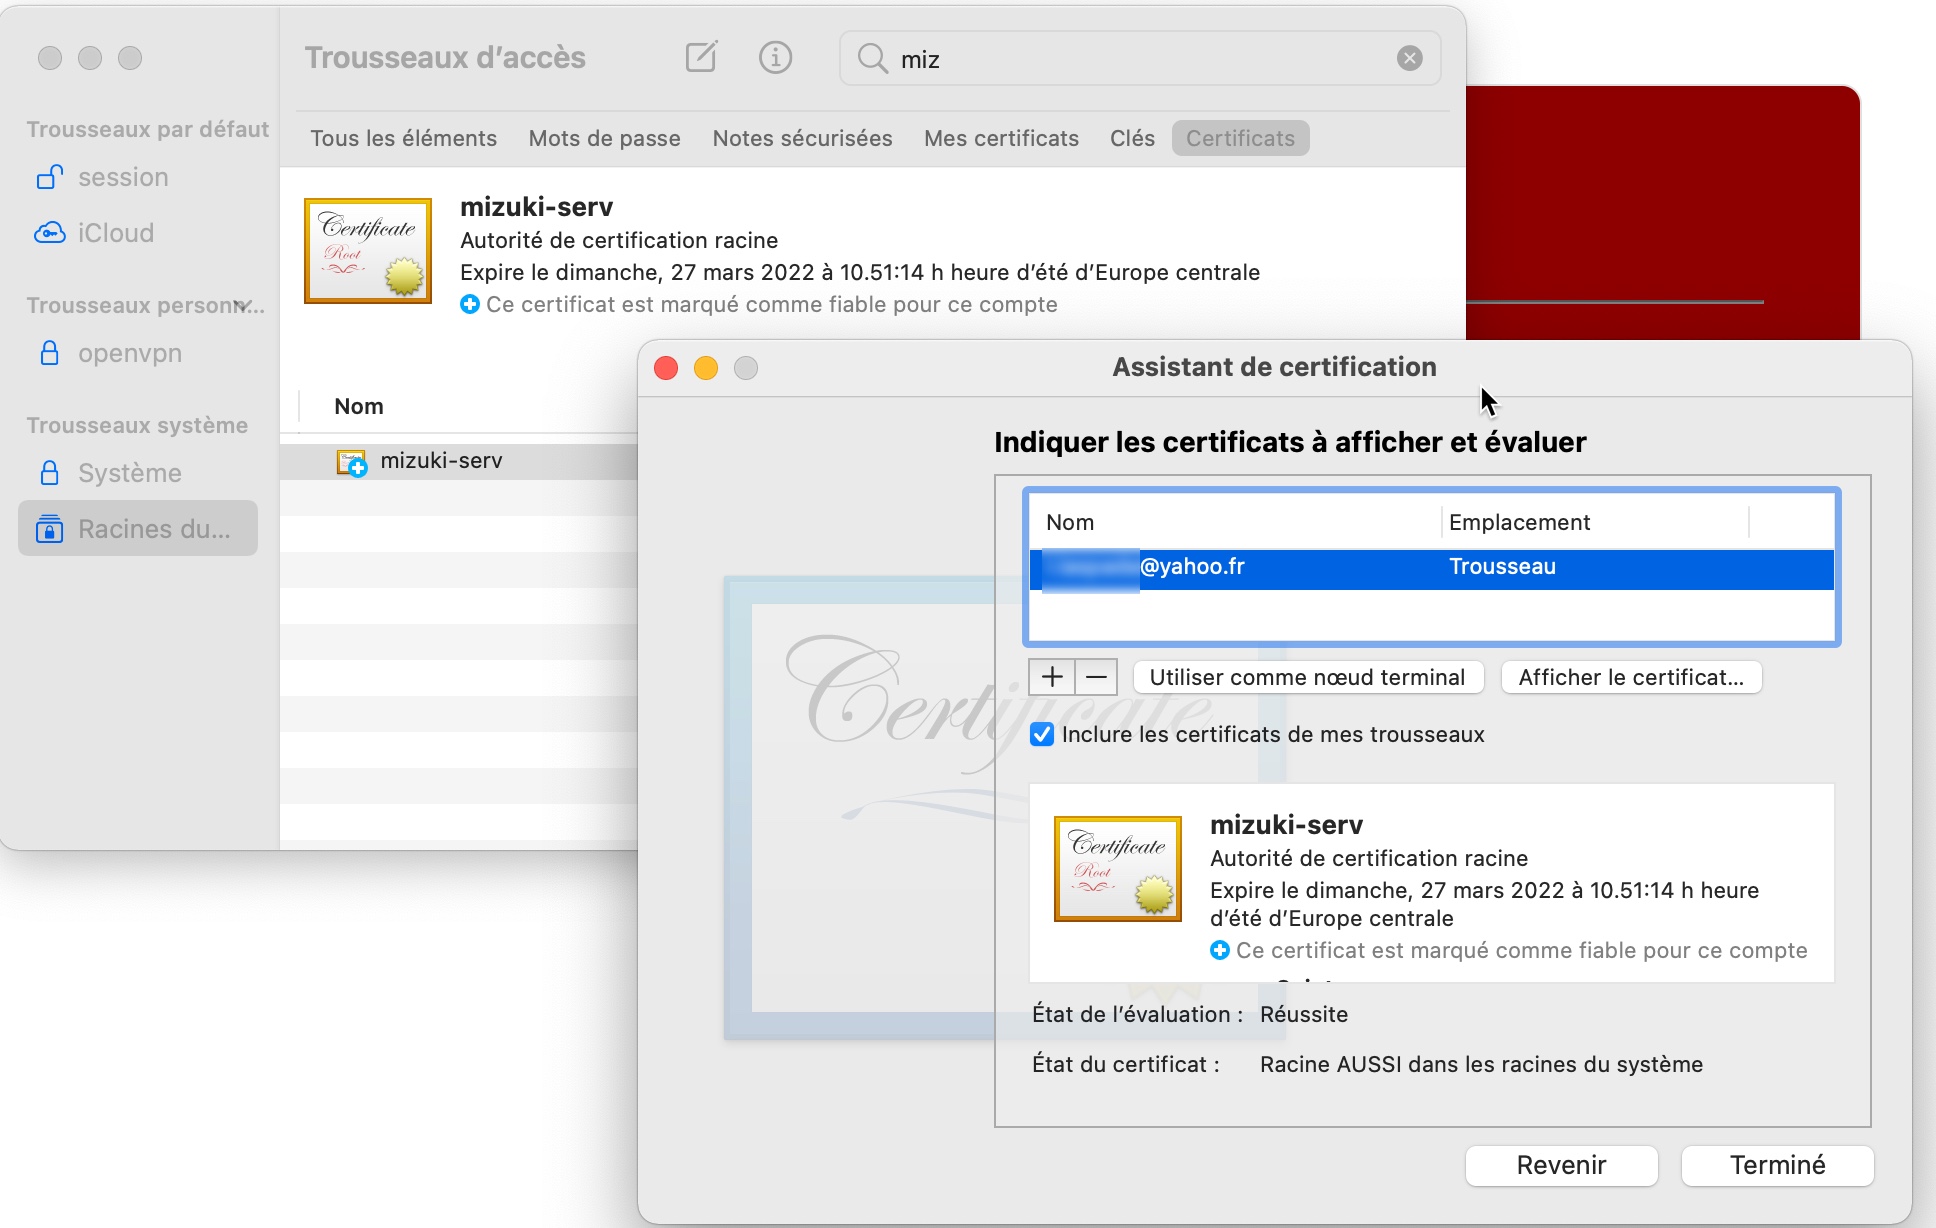
On a Mac, you can import and validate the certificate in the Keycahin Access app. If you don’t do that, Mail and other app will complain about the certificate being not reliable. You can also import and validate your certificate on an iPad or iPhone.
That’s it! At this point, if you refresh your browser, you should have access to Internet from your r-pi WiFi access point, and all traffic should be filtered by Squid (and SquidGuard if you are coming from the previous project). You do not need to configure your browser to point to the proxy as all settings are done on the r-pi itself.
Check the traffic on the squid access log
sudo tail -f /var/log/squid/access.log | ccze
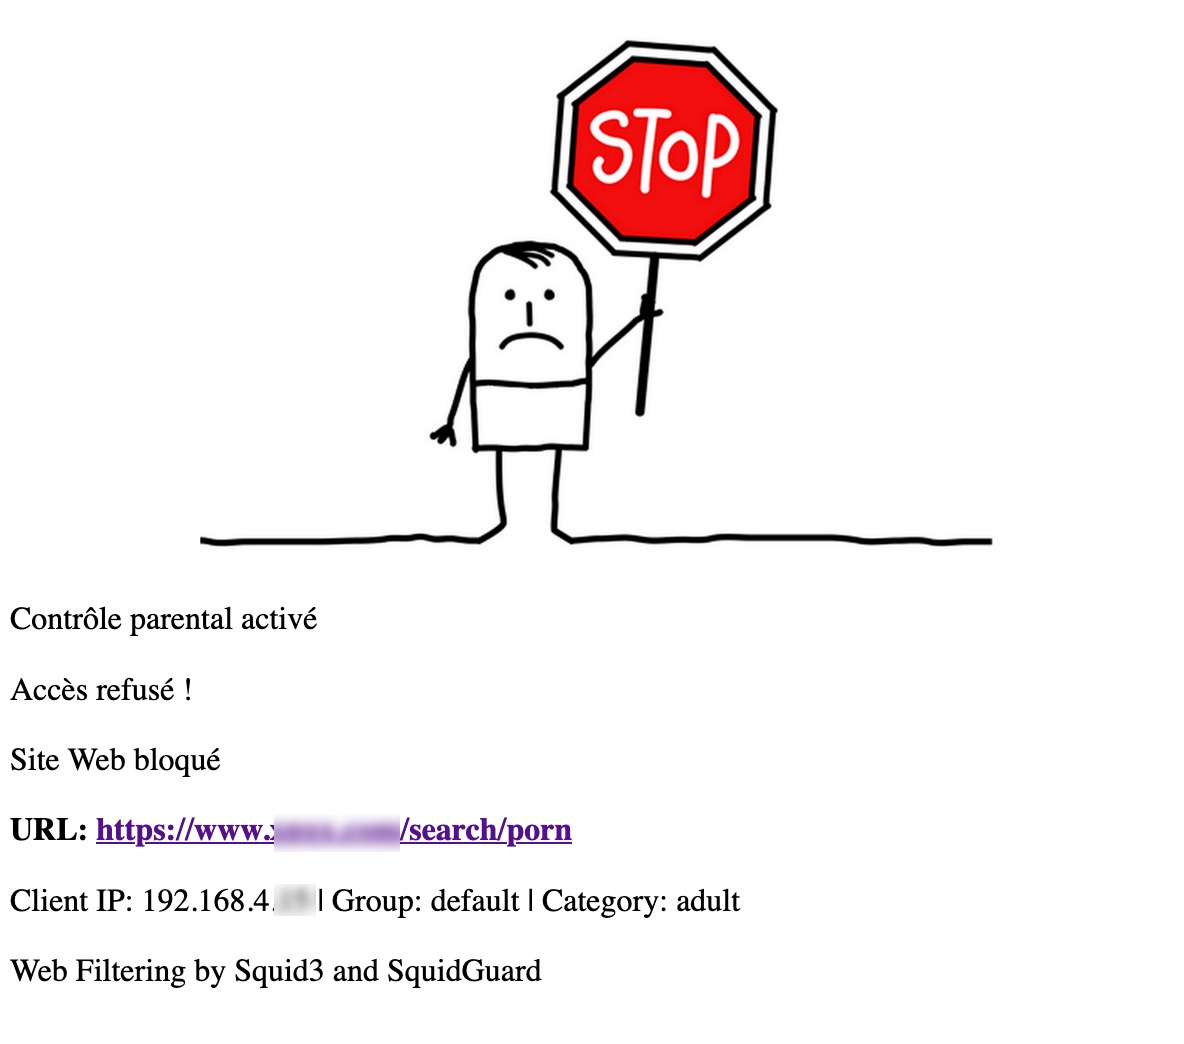
Now, if you have set up you r-pi with both Squid and SquidGuard as developped in another project, when trying to access a forbdiden website, SquidGuard will return the following:
Voilà! That was fun to do. Hope you enjoyed. Please share comments in the chat box below. Thanks!
Reference
https://www.youtube.com/watch?v=Bogdplu_lsE
https://elatov.github.io/2019/01/using-squid-to-proxy-ssl-sites/
der cert